
Gluten has been a tough one for us. When Emma has too much gluten in her diet I can tell a different in her gut. She has less energy and her belly is sour. All of her celiac testing came back negative but I can assure you that it does not agree with her. We are on a slow journey with gluten and have a long way to go. The first place we started though was bread. We have tried bread off the shelf and there is just not one that is edible in my opinion. We tried many different recipes and still did not have much luck until I stumbled across this recipe. We now make bread every weekend for the following week. This bread has substance and is gluten free...I never thought those two things could go together.
Really Good Gluten Free Sandwich Bread
1 Tbsp. bread machine yeast
1 Tbsp. sugar
1 ½ c. water (105 degrees or a little less than hot)
2 ½ cups of my gluten free flour mix (recipe below)
2 tsp. xanthan gum
1tsp. salt
3 eggs (or 9 Tbsp. water and 3 Tbsp. ground flax seed)
1 ½ Tbsp. oil
1 tsp. cider vinegar
1. Start by combining the yeast and sugar in a small bowl (I use the smallest in my set of three nested mixing bowls). Add the water while gently stirring the yeast and sugar. Let this mixture sit while you mix the rest of the ingredients – bubbles and foam should form if the yeast is happy.
2. Combine the flour mix, xanthan gum and salt in the largest mixing bowl and stir well.
3. In a third bowl, whisk the eggs, oil and vinegar until the eggs are a bit frothy.
4. By this point the yeast mixture should be foamy, so you can pour the two liquid mixtures into the flour mixture. Blend the dough with a mixer for 4 minutes.
Bread Machine Directions:
Scoop your dough into the bread machine and smooth the top of the dough. I bake my bread using an 80 minute setting that allows for 20 minutes of kneading, 18 minutes of rise, and 42 minutes of baking. However, since I don’t use the paddle in by bread machine, I’m effectively doing a 38 minute rise and a 42 minute bake. (The advantage of not using the paddle is that you don’t end up with a hole in the bottom of your bread.)
Conventional Oven Directions:
Scoop the dough into a greased loaf pan. Allow the dough to rise in a warm area until is is about 1 inch from the top of the pan. Then bake at 375 degrees for 50 – 60 minutes.
Other Notes:
- The masa harina in the flour mix for this recipe is usually available in the Hispanic sections of most grocery stores. Due to the way it is processed, masa harina is very absorbent and you cannot substitute corn meal or corn flour. You can purchase masa harina on Amazon.com if it is not available locally.
- If you are allergic to corn there is a corn free version of this recipe that uses tapioca starch, almond flour, and guar gum. The recipe is currently available as part of the Gluten Free Bread 101 class
- If you are allergic to soy, then you can substitute any of the following flours for the soy flour in the flour mix: sorghum flour, garfava flour, or quinoa flour.
- If you’re looking for a gluten free milk bread recipe, you can make this bread using milk instead of water. In fact, originally this recipe was developed with milk and then switched to water to cut down on the cost and to make it casein free. If you are on a dairy-free diet, then you may use a plain gluten free non-dairy milk..
- If you are allergic to eggs, use the flax substitute listed in the recipe, or follow the instructions on your favorite egg replacement powder. When you use the flax eggs, the bread is usually slightly wetter than otherwise.
Gluten Free All Purpose Flour Mix
3 parts brown rice flour
3 parts corn starch
2 parts soy flour
Light and Fluffy Gluten Free Biscuits
(Yield: 16 large biscuits)
1 1/2 c. brown rice flour
2 c. corn starch*
1/2 c. soy flour or sorghum flour
2 tsp. baking powder
2 tsp. salt
1 1/2 tsp. baking soda
2 tsp. xanthan gum
1 stick of butter* (chilled in the freezer)
1 1/4 c. soy milk*
1 1/4 c. water
1 Tbsp. cider vinegar*
1 egg, beaten (or the equivalent amount of your favorite egg replacement)
1. Preheat your oven to 350 degrees.
2. In a large mixing bowl thoroughly combine the flours, baking powder, salt, baking soda, and xanthan gum.
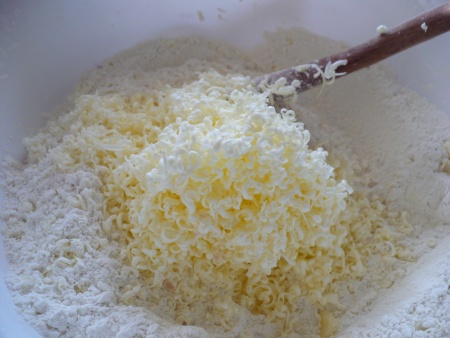
3. Grate the butter into the flour using the small holed side of a box grater. Mix the butter into the flour so that there are no large balls of grated butter.
4. Add the soy milk, water, vinegar and beaten egg to the flour and stir until the dry and liquid ingredients are combined.
5. Using a large spoon, drop the dough onto a greased pan to make 16 biscuits. Cook at 350 degrees for 15 minutes or until golden brown.
Cook’s Notes:
1. If you’re not vegan or dairy free, feel free to use 1 c. buttermilk in place of the soy milk and vinegar. If you’re allergic to soy, try using your usual milk substitute and keep the vinegar in the recipe.
2. You may substitute potato starch or tapioca flour for the cornstarch.
3. 1 stick of butter = 8 Tbsp. = 1/2 c. = 1/4 lb. = 115 grams
4. Earth Balance Buttery Sticks should work if you need this to be casein free. According to their website the sticks are gluten and dairy free.
5. Thanks to Kate at Gluten Free Gobsmacked for the tip on grating the butter. It was a lot of fun and decreased my prep time by quite a bit.
Gluten Free Pancakes
(Yield: one dozen)
2 1/3 c. of my gluten free flour mix
2 Tbsp. sugar
2 tsp. baking powder
1/2 tsp. salt
1 1/2 c. soy milk (or cow’s milk)
3 Tbsp butter, melted (or canola oil)
2 eggs, beaten (or 6 Tbsp. water and 2 Tbsp. ground flax seed)
1/2 tsp. vanilla
Instructions: Combine the first four ingredients in a large mixing bowl and give it a few whisks. Crack the eggs into a separate bowl and whisk them until they are well beaten. Add the soy milk, butter, and vanilla to the eggs and whisk again.
Pour the wet ingredients into the dry ingredients and stir until the ingredients are combined. (You can abandon the whisk at this point and grab a wooden spoon.) Stir the batter until all of the flour is mixed in. This should just take a few seconds – there will still be lumps in the batter and that is okay. Put the batter aside while you heat up the griddle.
Put a teaspoon of butter on your griddle or non-stick skillet and heat on medium. Once the butter has melted, use your spatula to spread the butter over the entire surface of the skillet. This is going to keep the pancakes from sticking.
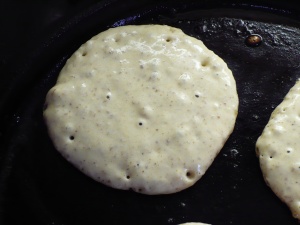
Using a 1/4 c. measuring cup, dip the batter out of the bowl and pour onto your skillet. I can generally fit three pancakes on my skillet at once. Let the pancakes cook and do not touch them until you see bubbles popping in the middle of the pancake like this:
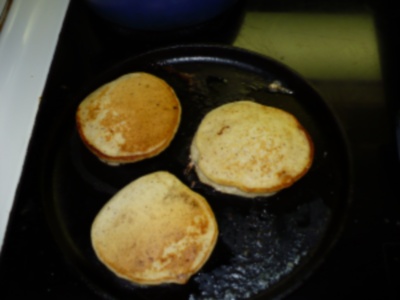
Now, flip the pancakes immediately. They will only cook for a minute or two on the second side, and you can use your spatula to peek and see if they are as brown as you want them. Once they are, take them off the griddle and slip them into a plate that is warming in a 200 degree oven. Put some more butter on your skillet and do it again.
Tips:
Adding the melted butter to the other ingredients can be a bit tricky. If the butter is too hot, then it may cook the eggs. If the milk and eggs are super cold, then the butter may re-solidify once you add it in. The solution is to have all of your ingredients at room temperature. However, this is not always convenient, so I sometimes substitute canola oil for the butter just to make my life a little easier.
If the pancakes are turning out darker than you like, or if the butter in the skillet is turning brown, turn the heat down. I usually have to turn my skillet down to medium low after the first batch. You may even need to take the skillet off of the heating element for a few minutes to let the skillet cool down. Don’t worry, you’ll soon get a feel for it.
On the other hand, if you’re not sure that the pancakes are done, just use the corner of your spatula to make a small slice in the middle of the pancake. Press down on the pancake and if you see oozing batter keep cooking.
If you’re having trouble with the pancakes sticking to the skillet add more butter or try another skillet. I use a Lodge Logic Cast Iron Griddle
If the pancakes fall apart when you flip them, then you’re either flipping them too soon, or you need a bigger spatula. Ideally, the spatula should be wider than the pancakes. Here is a list of pancake spatulas
Source:
http://www.glutenfreecookingschool.com/
No comments:
Post a Comment